Now all roads lead to France and heavy is the tread
Of the living; but the dead returning lightly dance.
Edward Thomas, Roads

Thursday, October 31, 2013

31 October 1914 –
The Western Front's Last Piece:
The Fight at Gheluvelt Chateau

It was the day the war of movement on the Western Front stopped. Afterward there would be no big breakthroughs until 1918, and forty-one months of trench warfare would ensue.  By mid-day on 31 October 1914 there were no more flanks, just one last gap in the entire line from the Swiss border to the English Channel where a breakthrough seemed possible. It was at a place five miles east of Ypres on the grounds of Gheluvelt Chateau, just north of the Menin Road. 

Gheluvelt Chateau Today

Shortly before noon the line of the British 1st Division was broken at Gheluvelt.  If at that moment German reinforcements available close at hand could thrust through the gap and spread out fanwise, they could have rolled up the defenders on either flank in their rear and simply broken the cohesion of the British in Flanders to pieces. The impulse of retreat began to seize the British troops. Already men and guns were streaming back towards Ypres. The Germans quickly assembled thirteen battalions for a final follow-through attack. 

General Charles FitzClarence commanding the British Army 1st Brigade, was nearby and saw the declining situation. At Polygon Wood north of Gheluvelt, he got hold of the 2nd Worcestershires, part of the reserve of the 2nd Division on the north, and ordered them to counterattack immediately. This movement had scarcely begun when a shell burst in Hooge Chateau, where the staff of both divisions had assembled for a conference, and practically destroyed them.

But the Worcestershires — a tiny force of eight officers and 360 men — swept all before them nonetheless. They fell upon their adversaries, who were mostly Bavarians, and drove them back in confusion from the chateau grounds. The line was reestablished.  The Western Front of the Great War was effectively completed. It would not move dramatically until the first Ludendorff Offensive of 1918.  General FitzClarence, sadly, did not have much longer to live. He died on 11 November 1914 in fighting along the Menin Road, where many more would fall in the remaining four years of war.

After the Victory: Gheluvelt, 31 October 1914


Wednesday, October 30, 2013

Remembering a Veteran:
Walter Draycot, Princess Patricia's Light Infantry, CEF

Contributed by Jane Mattisson


Twenty-eight years ago this month, Walter MacKay Draycot – rifleman, topographer, photographer and (unpublished) memoir writer – died in North Vancouver, Canada, at the age of 102. Born in 1885 in Leicestershire, England, Draycot served in the Boer War as a member of the 60th Rifles and Engineers. He emigrated to Canada in 1907, was employed for a few months by the Canadian Pacific Railway as a railroad worker, set up business as a farmer/merchant in Ontario in 1910, and in 1911 he settled in Lynn Valley on the west coast of Canada.

Walter Draycot at Vimy Ridge


When war was declared, Draycot was not slow to enlist despite his age (29). He signed up with his old Boer War regiment but was shortly afterward transferred to Princess Patricia’s Canadian Light Infantry. He performed a wide range of duties, as regimental barber, sketcher, topographer, and acting intelligence officer. Draycot described his war career in the third person, as follows:

On the outbreak of the 1914–18 War he was back again in England with his old regiment. While waiting to be Commissioned as an officer he was claimed by Colonel Farquar of the Famous Princess Patricia’s on the grounds he was a Canadian Citizen. His exploits have been written in an unpublished typed book. Appointed Military Topographer. Being the only exponent of that art in the Brigade of 4,000 men, he was sought by General Macdonnel for service in the 7th Canadian Infantry Brigade. Both the Division and Corps wanted his services, but Macdonnel retained him. Appointed the only Official Sketcher in the Canadian Army with credentials. Thrice wounded. Arrested several times as a spy, when sketching. Twice ‘gassed’; the last dose sent him to England where, after recovering, he conducted a school to teach officers the art of Military Sketching and Topography. After the War, some of his sketches were printed – see his book; it tells all.  

(Early Days in Lynn Valley, 13. The ‘book’ referred to is Draycot’s memoir Pawn No. 883: Being the Adventures of a Pawn in the Affairs of 1914–18, which is housed at the North Vancouver Museum & Archives, North Vancouver, BC. His sketch below provides a sanitized view of conditions at Vimy Ridge.)


Detail from Draycot's Vimy Sketch


Draycot fought at Ypres, the Somme, and Vimy Ridge. Vimy was his final battle. After being gassed, he was shipped to England for convalescence.


Draycot during his convalescence
(in the front row, farthest to the right)

Draycot’s memoir and diary entries contain details about the daily routines of the soldier as well as close shaves with death. Of the latter, one episode is particularly memorable and is described in the memoir as follows:

A small brook flowed through Sanctuary Wood. Any activity in this area could be seen by the observer in the Bird Cage. However, it was necessary to obtain information during daylight. Forgetful, as we all become when engrossed in a subject, my mind being on my work led me forward scanning here and there taking notes and measurements. Something compelled me to turn round. Horrors of Horrors! There was the Bird Cage – in full view! Stupefied, my blood froze at the sight. He could see me! My position was likened to an oasis in the desert .

Draycot’s war career was tinged with bitterness; enlisting as a private but doing the work of a trained topographer (he learned this from Baden Powell) and acting intelligence officer, he never forgave the army for its refusal to honour his temporary promotion to sergeant in 1916. The reason given was that Draycot could not be promoted permanently because, during much of the war, he was on temporary loan to other regiments as a topographer. Private he was – and private he would remain.

On returning to Lynn Valley after his convalescence, Draycot worked for the local community, as justice of the peace (from 1923 to 1975) and as a Scout leader. One year after his death on 21 October 1985, a statue was erected in Lynn Valley in his honour. Peacetime finally gave him the recognition that he was unable to gain in time of war.


Tuesday, October 29, 2013

Special Halloween Film Review:
Deathwatch: Religious Allegory or Great War Zombie Film – Or Both?


Deathwatch: Deliver Them From Evil

Lionsgate Films, DVD, 2003

Deathwatch Does an Excellent Job Depicting the Standard Trench Warfare Scenery


Dear Readers,


Our regular contributor on literary matters, David Beer – in his usual serious and insightful manner — has contributed, a review of what is, to our mutual understanding, the only known cross-genre World War One/ghoul film, Deathwatch, for our special Halloween posting.  David's review, which focuses on the movie's religious implications, stands alone and is worthy of your attention.  However, after your editor read the draft of the review, he came to the conclusion that David, who is usually au courant with the latest developments in popular culture, had overlooked (or chosen to avert his gaze from) a dimension of the film that is part of a truly big phenomenon these days.  His review sidesteps the "living dead," that is to say, the zombie, elements of Deathwatch. While being a little subtle in its "Z" symbolism and avoiding any use of the "Z" word in the script,   Deathwatch, nevertheless, has earned a place on various lists of "Best Zombie" productions—right up there with Walking DeadWorld War Z, and my personal favorite, Zombieland.  Since David passed over the zombie clues in his review, your editor has supplemented his text below with stills from the film that capture the film's zombie essence.  MH


Review by David F. Beer

This film brought to mind two lines from the last poem Isaac Rosenberg wrote before he was killed in action. The poem, “Through These Pale Cold Days,” describes suffering soldiers and states how "They see with living eyes/How long they have been dead." This is about as close to a spoiler as I want to go in discussing this horror film based on WWI. The surface plot is easily described. A group of British soldiers go over the top at night into the 
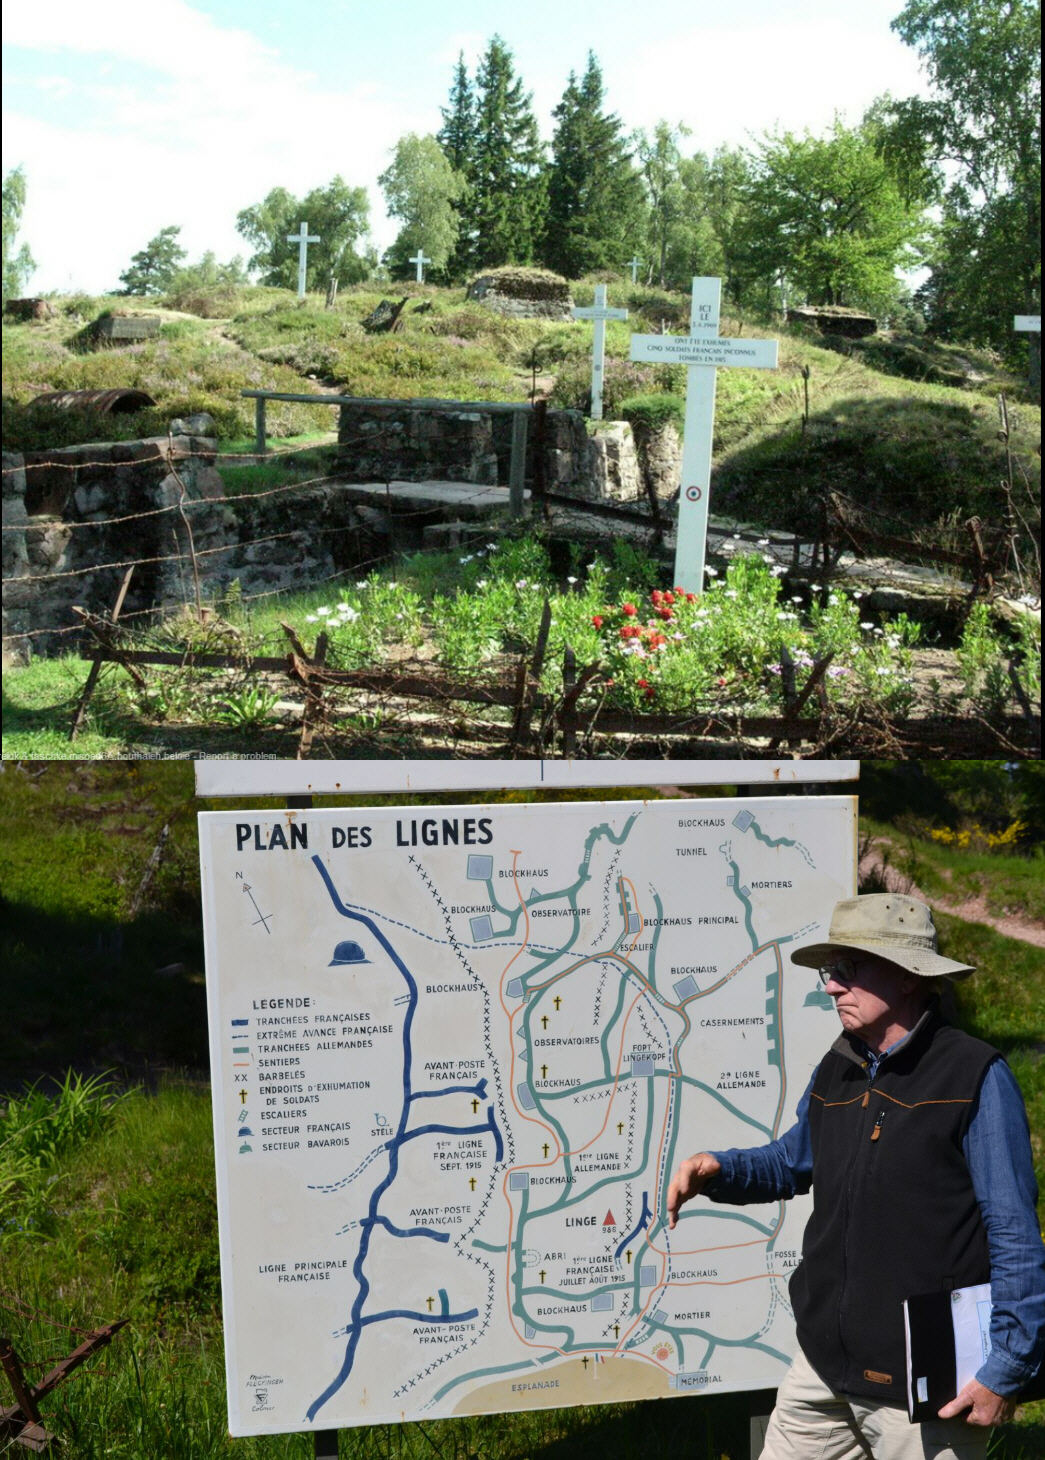
face of intense machine gun fire and exploding shells. Several standard trench warfare motifs are provided: the fear before the attack, the youngest soldier panicking and refusing to go over until threatened at gunpoint by an officer 
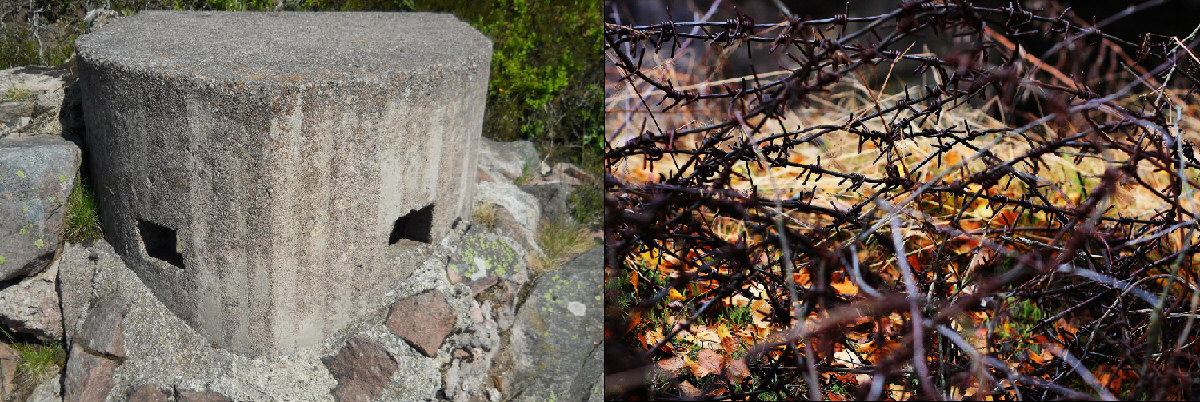
and helped by a sympathetic comrade, tangles of barbed wire to negotiate or get caught up in, mud containing bloated corpses, and the inevitable mowing down of men by the enemy’s furious fire power.


The Corpses Have a Peculiar Look to Them, However


It’s almost unbelievable that anyone could live through such a "stunt" but surprisingly the next scene shows a group of apparent survivors trudging over no man’s land in thick fog that they mistake for gas. When they discover it’s only fog and remove their masks, one soldier wonders what happened to the night — he can’t understand how it suddenly became light. Apart from the ominous and eerie background music we've heard from the beginning of the film, this is the first hint we get that all is not normal. Further hints will occur, however, such as a compass that no longer works, barbed wire that seems to have a life of its own, and blood that seeps from the mud in the German trench the survivors now occupy.

All but one of the Germans in the trench are dispatched quickly enough, but not before it’s apparent that they are paralyzed with fear not of the British soldiers but of a nameless and invisible force that has already been decimating them. They try to warn the British about it but to no avail. Gradually it overcomes all but the youngest and most innocent soldier, named Charlie Shakespeare, who in the end is able to leave the dark trench and walk out into the light — but not before he glimpses all his dead comrades sitting around a fire in a dark corner of the trench, seemingly alive.

Motion Detected Among the Dead


To arrive at an understanding of what director/writer Michael J. Bassett seems to have in mind in this film (and it’s admittedly open to interpretation) we have to absorb numerous oblique hints. Why, for example, is the subtitle of the film “Deliver them from evil”? Why the quick focus on a cross one of the soldiers is wearing?  What is the significance of the Bible passage read over the pile of corpses? What are the ghostly voices that are heard at one point above the trench? Why such comments by the soldiers as "There’s so many dead," "God isn't here," "We are still alive," "We’re dead, Charlie, I know that now," and Charlie Shakespeare’s exclamation as he leaves the trench after seeing all his dead comrades sitting around a fire — "I’m not dead!"? And what do we make of the German soldier at the very end waiting, with a knowing look in his eyes, for the next squad of British soldiers who are about to occupy the trench?

Zombie Film Convention:  The Living Dead Need a Shot to the Head to Be Truly Dead


Film enthusiasts will enjoy Deathwatch — even though it’s considered a fairly low-budget B film — not only for its combination of supernatural horror mixed with a WWI movie, but also for the parts played by actors such as Andy Serkis of Planet of the Apes and Lord of the Rings among other accomplishments, by Jamie Bell as the young and decent Charlie Shakespeare who had lied about his age to get into the army, and by Laurence Fox, whom I last saw as Inspector Lewis’s assistant in the spin-off of the Inspector Morse series. No spoilers, or not too many, I hope, in this short review, but I can’t help concluding with part of another poem this film brought to mind — the opening lines of Wilfred Owen’s “Strange Meeting”:

                        It seemed that out of the battle I escaped
                        Down some profound dull tunnel, long since scooped
                        Through granites which Titanic wars had groined.
                        Yet also there encumbered sleepers groaned,
                        Too fast in thought or death to be bestirred.
                        Then, as I probed them, one sprang up, and stared
                        With piteous recognition in fixed eyes,
                        Lifting distressful hands as if to bless.
                        And by his smile, I knew that sullen hall,—
                        By his dead smile I knew we stood in Hell.


By David F. Beer (with a little help from the Editor)

Sunday, October 27, 2013

The Big Issue of 1918

It Was About Bodies

Manpower was the big issue that shaped the campaign of 1918 and, ultimately, the end of the war before years' end.  Consider this chart in which all the figures up through the Armistice are the actual numbers.


By late 1917 the war of attrition was working.  All the countries in the war since 1914 were running out of bodies. The flood of American troops projected to arrive in 1918 and 1919 exercised a hypnotic power over both sides. The French were going to wait for the Americans, and late in the year event General Haig decided it would be imprudent to restart the Flanders offensive before the reinforcements arrived.

On the other side, Hindenburg and Ludendorff, whose staff had made similar projections, faced a dilemma after what seemed to them to be a pretty successful 1917 — Russia was out of the war, Italy very nearly the same after the Caporetto disaster, and they had held off the attacks in Flanders. However, they realized that they faced the same demographic issues as their long-time opponents. Eventually, despite the infusion of troops made possible by the ending of the war on the Eastern Front, they were inevitably going to be badly outnumbered on the Western Front. They faced three options:

1.  Use the troops available from Russia to dig in and wait for the Allies to attack them. This, they viewed as just postponing the inevitable.

2.  Negotiate a settlement. This option meant they would have to give up most of the occupied territory in western Europe. The two Crown Princes who commanded armies, Wilhelm and Rupprecht, supported this, but the generals found it unpalatable to turn things over to the diplomats.

3.  Go on the offensive and try to solve things before the Yanks arrived in force. This is the choice they made, and you know what ensued.

Saturday, October 26, 2013

The Aero-Naval War in Full-Color Illustrations


Among the different forms of warfare conducted between 1914 and 1918, one of the newest was the the combination of ships and aircraft. There were not a lot of photos that caught their interaction. Illustrators, however, were only constrained by their imagination. And, as you will see below, they were utterly captivated by the mixture of the planes, airships, and fleets of the combatants. Here are five selections from Tony Langley's collection.


Click on Image to Expand

This Idealized Fleet Seems to Have Everything


Click on Image to Expand


A German Seaplane Conducts a Rescue at Sea Under Fire


Click on Image to Expand

A Surfaced Submarine (British?) Firing on a Zeppelin


Click on Image to Expand


British Seaplane Stalking a U-boat


Click on Image to Expand


A Mine Has Broken Away from Its Mooring, Threatening the Convoy;
A Seaplane Fires on It


Click on Image to Expand

Friday, October 25, 2013

Weapons of War: The Story of Hiram Maxim, Father of the Machine Gun


Even though, in fact, more men were killed by artillery fire than by bullets in the Great War, the war is remembered and is most strongly held in our collective memory as a machine gun war. The man who gave the world the machine gun was an American inventor named Hiram Maxim.

Click on Image to Expand

Hiram Maxim (Lower Left) with an Early Model of His Gun; Above Is the Model Purchased by the British Army in the 1890s


Hiram Maxim's Story


Born in 1840 in Sangersville, Maine, Maxim was apprenticed at fourteen to a carriage maker. While learning that trade, he exhibited a knack for invention, designing a mousetrap that automatically reset and rid local mills of rodents. He obtained the first of his 271 patents at age twenty-six for a curling iron. By his thirties, Maxim was becoming chief engineer of the United States Electric Lighting Co. in New York, for which he introduced carbon filaments for electric light bulbs. At the 1881 Paris Exhibition, he demonstrated an electric pressure regulator and was awarded the Legion d'Honneur. That same year he arrived in England to reorganize the London offices of the U.S. Electric Lighting Company.

At the Paris Exhibition in 1881, a man told Maxim that if he wanted to make a fortune, he should invent a machine that would help these Europeans kill each other. Maxim did would go on to sell his machine guns to European countries on the eve of World War I, changing the nature of combat.

Maxim harnessed a bullet's recoil power to create a portable machine gun that needed only one barrel to fire all of its bullets automatically. In 1884, Hiram Maxim built the first effective machine gun, which revolutionized warfare. Its precursor, the Gatling gun, was a hand-driven, crank-operated gun with first six, later ten, barrels. Maxim's innovation was to harness the recoil power of each bullet, a force strong enough to eject the used cartridge and draw in the next one. Structured in this way, the portable gun needed only one barrel to fire all of its bullets automatically. To maximize the gun's effectiveness, Maxim also developed his own smokeless powder, cordite. In 1884, he founded the Maxim Gun Company in Britain to produce his new weapon. Five years later, he licensed it to the British Army in 1889; the following year the Austrian, German, Italian, Swiss, and Russian armies also incorporated it into their firearm auxiliary.

In 1896, the Maxim Gun Company was bought out by Vickers, Ltd., of which Maxim became a director. The Vickers machine gun would become standard issue of the British Army during World War I.


Click on Image to Expand

Maxim and His Grandson Examine a WWI-Era Maxim Machine Gun; The Diagram Below Shows All 66 Parts of Another Model


Later in life Maxim turned his attention from warfare to flight, building a steam engine-powered airplane that briefly rose from the ground. While he was unable to achieve sustained flight, his amusement ride, the Captive Flying Machine, became a staple of British fairgrounds. Maxim died on 24 November 1916, as the Battle of the Somme, where over one million soldiers fell in four months of machine gun warfare, was winding down.

Sources:  PBS Website; Tony Langley; Royal Artillery Museum

Thursday, October 24, 2013

24 October 1917 – Disaster at Caporetto:
The Opening Battle

How Did Caporetto Occur? 


The Caporetto offensive launched  24 October 1917 along the Isonzo River, is considered one of the most decisive victories of the 20th century. It was boldly planned, very ably organized, and well executed. While two Austrian armies, under General Svetozar Borojevic von Bojna, attacked the Italian Third Army on the Carso and Bainsizza Plateaus on the lower ground near the Adriatic shore, further north in the more mountainous  part of the Isonzo sector, the German-Austrian Fourteenth Army, targeted the Italian Second Army. Comprising the six German divisions and nine Austrian under German General Otto von Below, with Konrad Krafft von Dellmensingen as his chief of staff, the Fourteenth Army's masterful  double breakthrough proved decisive, annihilating the Second Army.

The assault stunned Italians troops and their commanders, who fell back in confusion: Below's van reached Udine, the former site of the Italian general headquarters, by October 28 and was on the Tagliamento River by October 31. . .The Italians [eventually] sustained about 500,000 casualties, including 250,000 taken prisoner.   How could such a catastrophe occur in so short a period?  The answer–I believe–lies in the faulty deployment by the Italian Commando Supremo. Even the anxious Italian King, who visited Caporetto a few days before the attack, expressed skepticism over the dispositions made by his generals. The map and photos below should demonstrate these weaknesses to you. 

Click on Image to Expand

Important things to note:  A.  The opening day's battlefield was huge, roughly 12 x 12 miles; B. The front line and the Italian defensive lines weave back and forth across the Isonzo (Soca) River; C.  The large gap between Italian 2nd and 3rd lines;  D.  Tight fit of all three Italian Lines west of Tolmino (8). 

Following the Map from Top (North) to Bottom (South)


  • Mte. Rombon (1) was the site of ferocious mountaintop fighting right up to the opening of the 24 October offensive. It marks the northern extent of the Caporetto battlefield. Occupied by Bosnian troops, it gave the German-Austrian forces an excellent view of their enemy's deployments before the operation.  Far below its peak on the river lies the village of Plezzo (2).


  • Plezzo (2) was just behind the front line of 24 October. The front here crossed the Isonzo, meaning attacking forces would not need to force a river crossing, simplifying things greatly for them. Here Austrian divisions and German gas officers would execute the most successful gas attack of the First World War, and charge through a huge opening that opened the road to Caporetto.  The photos below show the area today


Click on Image to Expand

The view from the 3rd Italian line above the river bend looking northeast toward Plezzo (2) along the narrow river valley. Mte. Rombon (1) is in the far distance. In this area the mountains are quite close on either side of the river.


Click on Image to Expand

However, just along the river near Plezzo (2), there are some low flat spaces. Italian forces deployed here were hit with a lethal gas barrage, allowing a clean breakthrough by Austrian divisions.  One of the dirty secrets of WWI is that gas attacks were effective when used intelligently.


  • Moving south past a big bend in the Isonzo is the town of Caporetto (3), the opening objective and namesake of the battle.  It is a road-hub at the head of a second valley (off to the right on the photo below) and its capture allowed the deep pursuit into northern Italy after the initial  rout. 


  • Mte Nero (4), at 2244 meters on the left of the photo, was on the front line on 24 October.  Three Italian divisions, the 43rd, 46th, and 50th, were deployed just below its peak and that of a second summit on Mte Mrzili (5). Heavy fog and rain on the morning of the battle obscured the vision of these units. South of Caporetto most of the Italian 2nd line and all of the 3rd line were on the opposite side of the river. By mid morning, unbeknownst to them, the three divisions on Nero and Mrzili were being flanked from their left (also left on the photo) by the enemy units that had broken through at Plezzo (2) and were marching down the river edge. This was not their only danger, though.


Click on Image to Expand

About 10 miles south of Caporetto (3) lies another river town, Tolmino (8). General von Below was executing a second breakthrough there.


  • Below is a spectacular view of Tolmino (8) from a hang glider above the Isonzo.  Once again the front line and 2nd and 3rd Italian lines cross the river at a perpendicular just north of the town.  Here the Italian positions were too tightly bunched. Both the town and the high hill to the right of the town–part of the Tolmino Bridgehead (7)–were occupied by  German troops, as was the hill to the left of town which offers a superb view down the valley towards Caporetto.  Once again the Central Powers were able to attack on both sides of the river at the same time. Additionally, a strong attack here had the potential of punching  through all three Italian positions very quickly; and an assault from the Bridgehead (7) could be mounted attacking downhill. It was a position of maximum danger for the Italian Army and maximum opportunity for their opponents.


Click on Image to Expand

For orientation purposes:  Just out of view to the left of the glider is Mte Mrzili (5) and over the pilot's left shoulder is Mte Nero (4);  ahead is Tolmino (8) in the center and the Bridgehead (7) is to the right; out of view on pilot's right is Mte. Kolovrat (6).


  • The attack in this area had three branches. Out of Tolmino (8): One German division attacking out of Tolmino  advanced along the river and headed for Caporetto (3).  This group would join up later in the morning with the group advancing from the Plezzo (2) breakthrough. The three Italian divisions deployed along the slopes of Mrzili (5) and Nero (4) were cut-off and captured en masse. Many of those troops did not fire a shot in the battle.  Caporetto (3), itself, was secured by 1600 hours. 


  • Also out of Tolmino (8), German Alpenkorps (including Lt. Erwin Rommel) crossed over advanced on the other side of the river up onto the Mte Kolovrat (6) range to reduce the strong points of the 2nd and 3rd Italian positions.  Over several days each of these strong points were eliminated.


  • The third group attacked out the Bridgehead (7) and targeted the right flank of the Second Army where its XXVII Corps was deployed.  A relief of units was in progress when the attack hit and the confused Italian forces were devastated.  


  • In summary, almost all the troops in the three Second Army lines were killed or taken prisoner in the early stages of the fighting.  Subsequently those troops in reserve and in the rear areas were threatened by a double flanking maneuver that quickly followed the initial double breakthroughs out of Plezzo and Tolmino. After capturing Caporetto, the northern Austro-German force pushed west, then south into the Veneto. Meanwhile,  the force that advanced out of the Tolmino Bridgehead also threatened the flanks of the remains of Second Army on one side of its thrust and the Italian Third Army on the other side.  This effectively collapsed the entire Italian position along the length of the Isonzo River, leading to the headlong retreat that is the hallmark and most remembered aspect of the Battle of Caporetto.


Click on Image to Expand

The view from an artillery position on the Italian 3rd line on Mte Kolovrat (6). The hill just below marked the 2nd line. Rommel captured a position there early in the battle.  On the left just across the river, the early slopes of Mte. Mrzili (5) where the Italian 46th Division found itself stranded can be seen.


If only one of the attempted breakthroughs had succeeded, the Central Powers would have certainly gained a major victory at Caporetto.  However, with both succeeding on 24 October, an entire Italian Army was wiped off the board.  The heartland of Italy was threatened, and the positions of mountain troops to the north of Caporetto and and the 3rd Army to the south along the Adriatic were made untenable. In Italy today "A Caporetto" is another name for a disaster. In future postings on Roads to the Great War we will discuss the pursuit that followed the double breakthrough, and how Italy–after a long retreat–stabilized the situation along the Piave River.


Wednesday, October 23, 2013

Richard Sorge: Soldier of the Kaiser, Master Spy of Stalin

Richard Sorge (1892-1944) was a disabled German war veteran, who became a communist and Soviet spy. He was ultimately hanged, but only after organizing the spy ring in Japan that gave Stalin the exact date of Operation Barbarossa and the Japanese plans to attack Pearl Harbor.


Richard Sorge (Left) with a Fellow Soldier, 1915

Sorge was an idealistic student in 1914 when the war broke out. He volunteered for the German Army on 11 August 1914 and was assigned to the Third Guards Field Artillery Regiment. After minimal training, he was rushed into action and sent to the Yser sector in Flanders – a member of the tragic "Student Battalions." He saw his first fighting by November. Soon began his alienation and hatred of war.  During the summer of 1915 he was wounded by Belgian counterbattery fire and was evacuated to Berlin.

After convalescing, he was sent to the Eastern Front, where he was again wounded. After another cycle of hospital care and convalescence, he returned to action near Minsk and was wounded a third time, the most severe episode yet – shrapnel wounds almost costing him a leg. This would result in a fateful  hospital stay near Koningsberg during which he met and had a romance with a nurse whose father was an ardent communist. He eventually left the hospital and the military with an Iron Cross, 2nd Class, a permanent limp, and a totally radicalized political ideology.

He later wrote: "The World War from 1914 to 1918 exercised a profound influence upon my whole life. Had I been swayed by no other considerations, this war alone would have made me a Communist."

Richard Sorge in 1917 had started down the road to becoming Joseph Stalin's greatest spy of the Second World War. A good summary of his subsequent career and his success as the leader of the Tokyo Espionage Ring can be found here:
http://spymuseum.com/spies/richard-sorge/

Tuesday, October 22, 2013

To Crown the Waves: The Great Navies of the First World War
Reviewed by James Thomas


To Crown the Waves: The Great Navies of the First World War

Edited by Vincent P. O'Hara, W. David Dickson, and Richard Worth
Published by Naval Institute Press, 2013

Often it seems that the war at sea during the Great War is so overshadowed by the massive slaughter on land that it becomes a footnote to the war, or at best of secondary importance to the "real war" in the trenches. Naval historians have long disputed this, of course. The editors of To Crown the Waves contend that the naval war was, in fact, the source of victory for the Allies over the Central Powers: ". . . once the land war stalemated on the western front, it was on the waves that victory was determined." (p. 2)

To make this point, To Crown the Waves is a collection of studies of the world's major navies. Each of seven chapters examines the navy of the nations whose navies made a major contribution to the war. Great Britain, France, Russia, the United States, Italy, Germany, and the Austro-Hungarian Empire are each represented, with an eighth chapter for other nations whose navies participated in some way. Each chapter is written by an historian who specializes in a particular nation's naval history and who reads the language of the nation they are describing.

To Crown the Waves Features Excellent Images and Data Tables


Click on Image to Expand

A Photo from Steve McLaughlin's Chapter on the Russian Navy


The chapters then follow a common organizational format. The advantage of this is that the reader can easily learn parallel information for each navy. Unfortunately, this makes the book more of a reference source than for reading cover to cover. That said, despite the potential problem multi-author works of widely varying writing quality can have, the editors of To Crown the Waves do a fine job of giving the entire book a common voice and thus utterly readable.


Order Now
The format for each chapter begins with a "Backstory," a quick history of naval development for each country up to the Great War. This includes the nation's naval mission, construction philosophy, and potential enemies. Next is "Organization," which includes command, but also logistical information and personnel. The third section of each chapter describes the subject nation's "Way of War." This is the real "meat" of each chapter, making the next section "Wartime Experience and Evolution" almost anticlimactic. The chapters are then wrapped up with a "Summary and Assessments." Throughout all the chapters are plenty of charts, maps, and photographs. All the chapters are well done, and this organization makes the material easily accessible.

To Crown the Waves is not perfect, however. In the chapter on the United States, for example, twice there is reference to "Texas class" battleships. USS Texas, BB35, and her sister ship New York, BB34, were actually New York class. Mistakes such as this are rare and are ultimately of little consequence to the greater value of the book. In fact, To Crown the Waves is an excellent, well-researched and thorough study of the world's navies as they collided in World War One. Does it prove the contention that it was the fight at sea that brought victory and defeat in the war rather than those final offensives of 1918? That is left to the reader to decide.

James Thomas

Monday, October 21, 2013

War Celebrities as Collectibles

From Cyril Mazansky's Cigarette Card Collection


The celebrity culture apparently was alive and well during the Great War if this selection from the collection of regularly contributor Cyril Mazansky is any indication. Just as today, celebrities of the day were used to help sell things. Today big contracts are involved, but I have a feeling that none of the parties shown below received big endorsement contracts for helping to sell cigarettes. Some these images are excellent depictions of their subject, but in other cases—see Kaiser Wilhelm below—you have to wonder if the illustrator had ever seen a photo of the individual.

Click on Images to View Alone


Sunday, October 20, 2013

Visualizing Gallipoli

Visualizing Gallipoli: You Can Do It If You Have Ever Visited Marin County 


After my first visit to Gallipoli in 2009, I was invited by the San Francisco Bay Area Chapter of the old Great War Society to make a presentation about what I had discovered. I knew that my conclusions were going to surprise the members. After my visit, I had reversed my view that it was the great "missed opportunity" of the war. Instead, I became convinced that the Dardanelles Campaign was doomed from its inception – that the naval assault had been a much tougher nut to crack than I had previously believed and that the subsequent land campaign, initiated after the failure of the battleships, never had a chance.


Click on Image to Expand

This is a Google map of Gallipoli and the Straits with some of the better known landmarks identified. It has been rotated almost 90 degrees counterclockwise for this discussion.


Marin County, California, to the Rescue

To support my argument almost all of which was based on geography I felt I needed something concrete so I could share my sense of shock at how different the terrain was from what I had visualized after my readings about the campaign and viewing many of the famous photos all of those present at the meeting had seen. I found my solution just by looking around San Francisco Bay.

Click on Image to Expand

The southern part of Marin County, on the other side of the Golden Gate, is close in scale and shape to the Gallipoli Peninsula, sharing many of its features: bays, beaches, cliffs, highlands, plus its own mountain peaks, the most famous and tallest being Mt. Tamalpais. A number of these features are shown on the Google map of the Bay Area above with their Gallipoli equivalents.


Superimposing the Two Locales

Next, I found a nice user-friendly tourism map and created a slide, overlaying the Gallipoli sites as close to scale as I could place them. Some tugging and stretching was required, but overall, there seemed to be a good fit. The biggest shortcoming of the slide is that the mountains of Marin are not in the same alignment with the beaches as those on Gallipoli, although not so far out of kilter as to undercut the main points I wanted to make.


Click on Image to Expand


The most important aspect of this image is the mileage scale. Note that the landing beaches at Helles seem closely clustered but are actually miles apart, and the considerable distance of the Anzac landing site from the Helles beaches.


My Conclusions as Supported by the Composite

1. Given the terrain and distance apart, the two initial sectors, Cape Helles and Anzac, were never able to support one another. This violated the "concentration of forces" rule of warfare. 

2. Initially, the five landing beaches on Cape Helles presented a similar situation with forces unable to mutually support one another. This led to a delay in any organized effort to break out from the beaches, giving the Turkish defenders a chance to reinforce their defenses. Thus, the defenders very early were able to  block any advance by the invading forces, and for the remainder of the fighting as well. The operation at Helles was ill conceived and a failure from its first day. 


3. The initial French landing at Kum Kale was simply a wasted effort. 


4. The initial plan at Anzac was also unfeasible, requiring forces to land, reconnoiter, climb up steep hills, the highest nearly a thousand feet tall, and hold them with sufficient forces to resist any counterattacks. U.S. Marines at Iwo Jima, for example, required four days to secure Mt. Suribachi in 1945.  At Anzac, a comparable achievement would have been needed on the first day. Additionally, in terms of manpower, the Anzac landings were on a shoestring. Had the first troops taken the high ground on Day One of the invasion, the local commander, Mustafa Kemal, could (and did) bring more men, more quickly to the critical point. 

5. Summarizing points 1-4: the initial assault of 25 April 1915 was doomed to failure. But what about the August 1915 assault at Suvla? Most histories indicate this effort was well planned but was a failure because the sector commander, Lieutenant-General Sir Frederick Stopford, was incompetent, failing to move with alacrity to seize the surrounding high ground. The composite map does not make a contrary case alone, but a drive around Marin County does. Just like at Marin, the hills nearest the sea (the Aegean) at Gallipoli lead to a succession of higher hills, culminating in the Sari Bair massif. The attacking forces out of Suvlahad it succeeded to capture the lower surrounding hills still had a tremendous series of well-defended near-mountains to ascend. Turkish reinforcements arriving on the scene would have been deployed on those and halted any advance as the local commander, Mustafa Kemal–once again–could (and did).

6. From the above, I concluded (and still do) that the objectives of the Dardanelles Campaign were never achievable and the lives and resources committed to achieve them were wasted. Responses welcome.


Saturday, October 19, 2013

While Europe Fought: America Deploys on the Mexican Border


Contributed by John Cervone, U.S. Army, Retired


Click on Image to Expand


Battery A, Ready for Movement


On 15 May 2006, President George W. Bush announced the initiation of “Operation Jump Start,” a plan to use National Guard troops to assist the Border Patrol in restoring order to the region.   When Operation Jump Start concluded in July 2008, over 30,000 Army and Air Guard personnel in all 54 states and territories had served on the border. The National Guard  had also been deployed to the Mexican border 90 years earlier,  and many units repeated the experiences of their predecessors. Here is the story of one of those units.

In 1916, as the United States watched World War I unfold in Europe, General John J. Pershing led an expeditionary force against Pancho Villa. Light Battery A, Rhode Island Field Artillery, was called into federal service 19 June 1916 for duty with General Pershing during the Mexican border conflict. Members of the same unit would repeat history in August of 2006, when they were again deployed to the Mexican border, as part of "Operation Jump Start." In 1918 the Rhode Islanders also saw action during WWI with the American Expeditionary Force re-designated as the 1st Battalion, 103rd Field Artillery, an element of the 26th "Yankee" Division.


History records that only one regiment of the National Guard, the 2nd Massachusetts Infantry, actually entered Mexico with Pershing's Expedition. The Rhode Islanders along with the bulk of the National Guard troops would not cross the border into Mexico but were used mainly as a show of force. But be that as it may, as you have previously read, activities on the border were far from dull. The troops were on constant alert as border raids were still an occasional nuisance. As it later proved, the expedition was an excellent training environment for the officers and men of the National Guard, who were recalled to federal service later on in 1917 for duty in World War I. Many National Guard leaders in both World Wars traced their first federal service to the Mexican Expedition.

Military deployments are not always as simple as they are presented by Hollywood and those who have never been deployed. A deployment is hard work with little appreciation. A deployment to the desert can be both dangerous and strenuous. Only someone who has faced this type of danger truly understands the meaning of the word “deployment.” Remaining in the rear with the gear does not qualify even one iota. The troopers of the 103rd Field Artillery experienced this type of danger in 1916 and later on in 2006. Here are some of the situations they endured while in Mexico. Not everyone is wounded or killed in battle. Sometimes the daily rigors of life in the desert can also take their toll on soldiers.


Click on Image to Expand


Battery A, on the Mexican Border


The unit left Quonset Point on 9 June 2016 and had a very rapid trip to the border. The trip took only four days in all. While deploying to the border, they experienced firsthand how unprepared the nation was for transporting troops to their designated positions.  They were among the many units heading to the border, by train, who did not receive proper berthing accommodations until reaching Kansas City.  The railroads seemed to lack even the proper number of trains necessary to move thousands of troops from one section of the country to the other.  They even encountered delays upon arriving in El Paso. They had to wait hours before vehicles arrived to shuttle them to Fort Bliss.

The 103rd arrived at Fort Bliss after midnight and did not unload their gear until the following day. They were assigned to an area known as “Morningside Heights” and were greeted by fifty-seven varieties of cactus, snakes, lizards, scorpions, tarantulas, and hot burning sand. A large ravine ran right through the middle of the camp which was later to be found out became a raging river whenever it rained hard for more than fifteen minutes. As it rained about four or five times a day needless to say the area was not suited to an artillery unit. 

So they set up camp in this wasteland and with temperatures of over 120 degrees went to work with shovels, picks, and axes to set up a suitable camp. It took them over ten days to actually become acclimated to the heat and drinking water was always in high demand. After much hard work the camp was finished only to be told by a camp inspector that they had been assigned to this area incorrectly and were ordered to move to another location. They were moved twice more after clearing land and making it habitable for living.

All of this sounds very familiar to anyone who has been involved in a military deployment. Hurry up and wait or hurry up and move. I imagine that in many ways this keeps a soldier on his toes and never gives them any time to become complacent or bored.

One of the biggest problems facing the troops in El Paso was receiving the supplies they needed. Many of the outfits stationed there were poorly equipped when they arrived and were in the same state of disrepair when they left three months later.  Much of the equipment that was furnished was old and antiquated. The 103rd had to wait six weeks for cots for the men to sleep on. Before that many of them slept on the ground. As the 103rd was equipped with their own cooks, their meals were not as bad as some other units, but still lacked in quantity and taste.


Click on Image to Expand


Battery A, in France, 1918


One of the daily missions for the troops was breaking in “green” mules. The key to surviving this type of training was to avoid their hooves. Many a trooper discovered to their chagrin that a mule kicks with his front and rear hooves. The unit had over 68 mules attached to it so everyone was given a chance to prove their prowess and stamina with these four-legged troopers.

Another hazard to the troops was sandstorms, some of which could be compared to miniature cyclones. These weather events would come whirling through the camp taking up to whatever came in their way from clothes to tents. Hats would disappear never to be found again. These miniature cyclones were coming at such a constant rate that the men began setting up betting pools on when they would strike.

The general health of the men was good and on the whole most came back in better health than they arrived with. There were serious — and one fatal — accident from kicks by mules and falls from bucking horses. The days were spent waking to reveille, then mess call, cleaning out the stables and then feeding and watering the horses and cleaning equipment. They drilled with their horses, practicing leg signals and various riding movements including hurdling obstacles.


Click on Image to Expand


Battery A, North of Château-Thierry


By November of 1916, the Rhode Island unit returned home, but not for long. They were called back into federal service on 25 July 1917. The unit was then drafted into the U.S. Army on 5 August 1917.  The unit was stationed at Camp Curtis Guild, Boxford, Massachusetts, where it was assigned to the new 103rd Field Artillery, 26th Division, AEF.  They were deployed to France, where they served with distinction during the Second Battle of the Marne and the St. Mihiel and Meuse-Argonne Offensives.  The unit was demobilized at Camp Devens, Massachusetts, 29 April 1919.


Friday, October 18, 2013

Bearers Up! How the Great War's Stretcher Bearers Changed Military Medicine


Editor's Introduction:

This month's contributor, Dr. Emily Mayhew of Imperial College, London, is an expert on the medical treatment that the British Army soldiers of the Great War received. Her newest work on the subject, Wounded: From Battlefield to Blighty, 1914-1918, is being released this month by Bodley Head. 

I am proud to be presenting her article on stretcher bearers for two reasons. First, those brave and dedicated individuals began—out of necessity — a revolution in military medicine. The results: today's combat medics with modern facilities, are shown in the slide image below from one Dr. Mayhew's presentations. As "first responders" the World War I stretcher bearer had to initiate the care of men who had often been terribly mutilated by the new weapons of the industrial age, while under fire themselves. Then, still exposed, they had to evacuate their wounded from moonscape-like battlefields. 

It is this last point that makes me feel additionally proud to be presenting Dr. Mayhew's article. I am a graduate of the U.S. Air Force stretcher carrier's training course. Passing the obstacle course as a member of a stretcher team was the most physically demanding thing I did in my service time. Carrying that stretcher with a man aboard over a rope bridge above a creek, under and over barbed wire and many other obstacles, up and down the hills of Texas — all while the sergeants were gleefully throwing practice grenades at our feet and shaking that rope bridge – was the closest I ever came to the trench warfare experience. I did not realize that until I read Emily Mayhew's article.

To Read the Full Article:

Over the Top is our subscription magazine.  It is the one item we charge for. Together with the small revenues we receive from our Amazon.com commissions, these are the only revenues we have to support all our services, most of which are offered for free to encourage interest in the Great War of 1914-1918.  For information on ordering the current year's issues and CDs with our back issues, just download our PDF flyer at:


Each issue of Over the Top includes a main article, full-color images and photos, plus extra features in our "In Parenthesis" section.  For our October issue we have included a poem by Robert Service ("Shooting of Dan McGrew"), who made his way to the Western Front as a Red Cross ambulance driver. During his service he continued to write poems, which were gathered in the volume, titled Rhymes of a Red Cross Man from which this work, "The Stretcher-Bearer," was selected. He dedicated the collection to his brother, Lt. Albert Service, who was killed in Flanders in August 1916.


Thursday, October 17, 2013

Ninety-nine Years Ago: Quotes from October 1914

It is my Royal and Imperial Command that you exterminate first the treacherous English, and walk over General French's contemptible little Army. 
Kaiser Wilhelm II, 1 October

It is not true that Germany is guilty in having brought about the war. . .
It is not true that we wantonly violated Belgian neutrality. . .
It is not true that the life or property of a single Belgian citizen has been infringed by our soldiers, except where such an attack was dictated by the bitter necessity of self defense. . .
It is not true that our soldiers have brutally devastated Louvain. . .
Ninety-three German Intellectuals, in "An Appeal to World Culture," October 1914


Louvain Afterwards
Not Truly Brutally Devastated?


The great Sloven day approaches
A Russian and a Serb are bringing it
We shall be the masters here
Woe upon you German dogs!
Long live Serbia
Protest Song of Slovenes in Austro-Hungarian Service

Winston [Churchill] like every genius (and he really is a genius!) will not brook criticism and idolizes power and so has surrounded himself with 3rd class sycophants—I have told him this to his face!
Admiral Jacky Fisher, 10 October

It is the women of Europe who pay the price while war rages, and it will be the women who will pay again when war has run its bloody course and Europe sinks down into the slough of poverty like a harried beast too spent to wage the fight. It will be the son-less mothers who will bend their shoulders to the plough and wield in age-palsied hands the reap hook.
Kate Richards O'Hare
Magazine article, October 1914

The logic of the world is prior to all truth and falsehood.
Soon to be Austrian Artillery Officer and Prisoner of War Ludwig Wittgenstein 
Notebook entry for 18 October 


Our life is running at full speed.  Everyone is occupied by the war, with care for wounded and the arrangements for future Polish refugees.  The mood is wonderful, with a total belief in success and in victory.
Artist Konstantin Kandaurov in Moscow, October 1914

We are going on a 4 days train journey, probably to Belgium. I am tremendously excited.
Adolf Hitler, List Regiment, 21 October

29 October  Turkey Joins the Central Powers
Swimming in a sea of military defeats, the Ottoman leadership, it seems, should have opted for less war, not more, in 1914. The generation at the helm of the  state, however, welcomed the July Crisis not as a reprieve but as an opportunity to end the empire’s international isolation.
The Limits of Diplomacy: The Ottoman Empire and the First World War
Mustafa Aksakal

Field Marshal Sir John French


First Battle of Ypres, October/November 1914
I have no more reserves. The only men I have left are the sentries at my gates. I will take them where the line is broken, and the last of the English will die fighting. 
Sir John Denton French, Commander in Chief, BEF


Wednesday, October 16, 2013

A Forgotten Battlefield: Le Linge

The Fighting at Le Linge 


The struggle for Le Linge, a hilltop located fourteen miles west of Colmar in the Vosges Mountains, was one of the bloodiest battles of the First World War, but is mostly forgotten today. Between 20 July and 15 October 1915, the Germans organised their defense here in order to prevent French troops advancing on Colmar. In 1915 this area was part of the Alsace, which Germany considered its own. The fighting was extremely violent, with 17,000 killed counting both the French and German losses. Gas and flamethrowers were used here. Subsequently, as both sides came to realize that a major breakthrough in the Vosges was unfeasible, the hill was the site of some of the closest, most intense trench fighting of the Great War.


Click on Image to Expand

The area shown here between the 1914 border and the line of 1915-1918 was the only German territory occupied by the French Army before the Armistice.

Le Linge Today


The battlefield is situated at the top of a rocky hillock, dotted with a few trees and lined with trenches dug out of the sandstone. The bunkers and barbed wire which crisscrossed the area have been retained. A very moving memorial site, the battlefield contains numerous black-and-white crosses marking the final resting place of French and German troops. A museum includes numerous items found on the site: weapons, personal belongings, munitions, and other relics. Models of the battlefield, video clips, and photos further add to the experience

Click on Image to Expand

The view from the southern entrance to the site; below – a guide shows the trench network.


Click on Image to Expand

Four views of the various trench lines


Click on Image to Expand

Two distinguishing aspect of the Le Linge site: the extensive use of concrete by both sides and the well-preserved barbed wire barricades throughout.


Click on Image to Expand

My 2012 tour group at the northernmost outpost at Le Linge; right – a Chasseur Alpins ski-trooper on display in the excellent museum at the site.